lesson-3_Upload to GitHub
🐱 Upload your project to GitHub
Setup the contract address and ABI
Shield contract address and ABI were described directly, but let's refer to the contract address from the .env.local file and ABI from the artifacts folder generated at build time, respectively.
First, create a .env.local file in the packages/client folder.
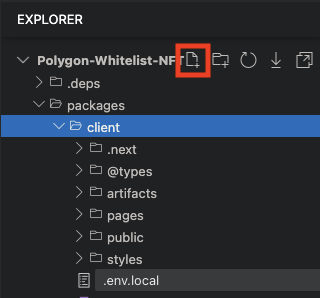
In the file you have created, write the following Set ADDRESS_OF_SHIELD_CONTRACT to your Shield contract address.
NEXT_PUBLIC_CONTRACT_ADDRESS=ADDRESS_OF_SHIELD_CONTRACT
When we updated hardhat.config.ts in Section5 Lesson 1, remember that you set the destination for the artifacts folder to be created in . /client/artifacts? Since we are running yarn contract compile in the monorepo run check, it is already generated in the packages/client folder and ABI should be able to import it from here.
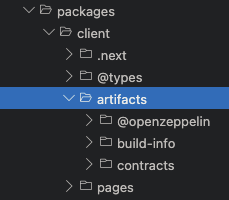
Now let's update pages/index.tx. Add the following import statement and update contractAddress and abi as follows.
import ShieldArtifact from "@/artifacts/contracts/Shield.sol/Shield.json";

const contractAddress = process.env.NEXT_PUBLIC_CONTRACT_ADDRESS as string;
const abi = ShieldArtifact.abi;
Setting up a .gitignore file
Let's set up a .gitignore file to specify files that will not be uploaded on GitHub.
Create a .gitignore file in the root of your project.
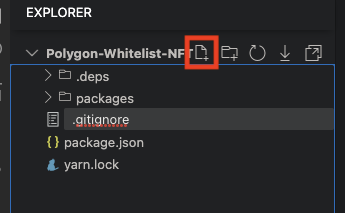
Include the following in your file.
**/yarn-error.log*

# dependencies
**/node_modules

# chainIDE
**/.deps
**/.build
Add the following to the .gitignore file in the packages/client folder.
# Hardhat files
artifacts
Nice work, and thank you for your time! You are now ready to upload to GitHub. Now, let's do the actual upload.
Upload to GitHub
Open Git Manager and select Create a new repo.
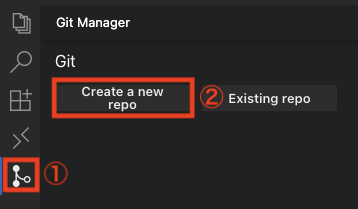
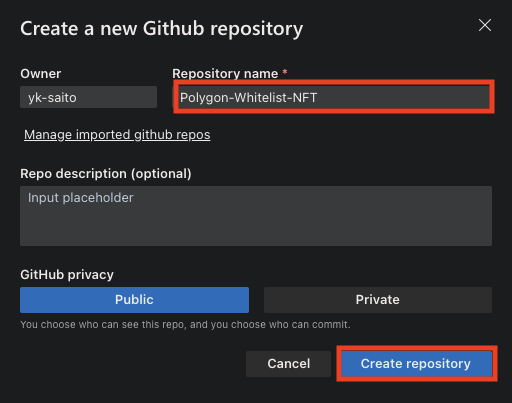
Make sure that the Owner is your GitHub account that you used to login to ChainIDE, enter Polygon-Whitelist-NFT for the Repository name, and click "Create repository".
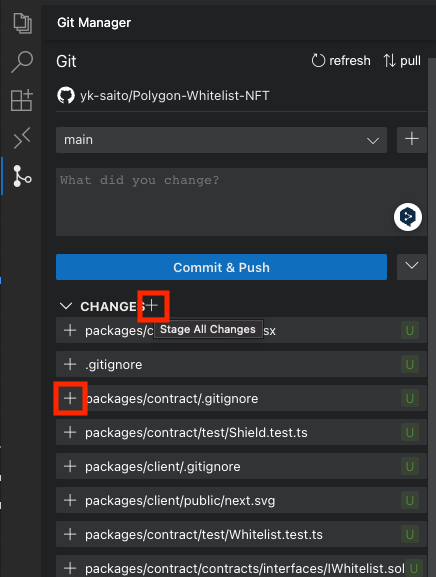
The Commit & Push screen will appear on the Git Manager; select the files you want to push to GitHub. We have set up a .gitignore file, but it is recommended that you check to make sure it does not contain any files you do not want to upload. You can change the staging with the "+" next to the files as you check them one by one, or you can change the staging all at once when you are done checking all the files(the "+" button appears when you hover over CHANGES).
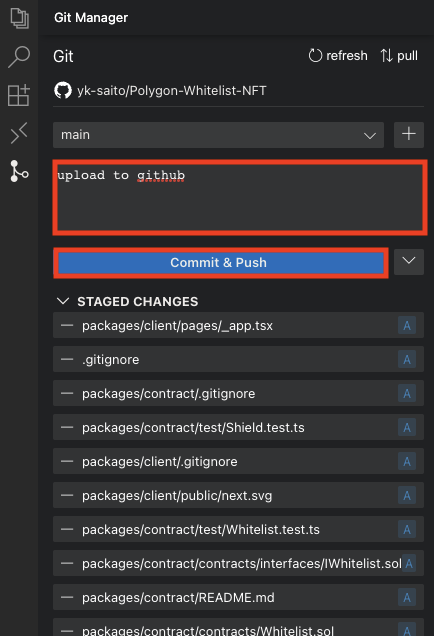
After all files are staged, enter a commit message and click "Commit & Push".
Go to your GitHub account and make sure the files have been uploaded to the Polygon-Whitelist-NFT repository.
🤟 Deploying a Web Application to Vercel
To deploy an application to Vercel, please refer to Deploying a Web Application in Vercel
🎊 You did it!
Congratulations! You've completed a full-stack project of an NFT Collection that only allows whitelisted users to mint. You took a significant step toward your web3 journey. I genuinely share your joy in this accomplishment.
However, just as I used to face post-lesson homework back in my student days, I might be passing on some of that challenge to you now, 😁. So, please take a moment to rest and consider the following questions:
- The mint function of the Shield contract allows whitelisted users to directly mint after the owner deploys the contract. Is there a way to modify it so that only after the owner sets permission can whitelisted users mint?
- The mint function of the Shield contract doesn't currently restrict the number of mints per whitelisted user. How can you modify the code to limit each whitelisted user to only one mint?
- If you want to grant minting permissions to everyone after whitelisted users have minted through the Shield contract, how should the code be designed?
- The Whitelist contract uses a mapping to record whitelisted addresses. If the number of addresses exceeds 1000, it could consume a significant amount of gas. What can be done to address this?
These questions might be a bit challenging, but there are hints within the article itself. Stay determined, and I believe your intelligence will guide you to the solutions. If you ever find yourself stuck, feel free to follow us; the upcoming articles will reveal the answers!
Peace!
🙋♂️ Asking Questions
If you have any uncertainties or issues with the work done so far, please ask in the #polygon channel on Discord.
To streamline the assistance process, kindly include the following 4 points in your error report ✨:
1. Section and lesson number related to the question
2. What you were trying to do
3. Copy & paste the error message
4. Screenshot of the error screen
🎫 Get an NFT!
The conditions for obtaining an NFT are as follows:
- All MVP features have been implemented(Implementation OK).
- MVP functions are working seamlessly on the web application(Testing OK).
- Fill out the Project Completion Form linked at the end of this page.
- Please share your OpenSea link in the Discord
🔥|completed-projectschannel 😉🎉. When posting on Discord, we'd appreciate it if you could also mention any additional features you implemented and provide an overview!
Those who complete the project will receive an NFT.
The Project Completion Form can be found here.